

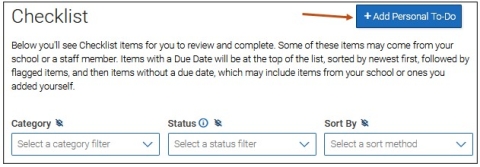
Checklist
What: Checklist lets students view personal To-Do’s for students, staff-assigned To-Dos, To-Dos/Events/Tips created in the Content Administration Tool, and Journey Steps as a single list.
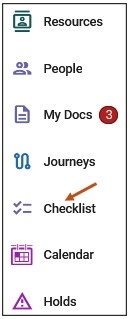
Where: Students can Access their Checklist icon on their Navigate Student Desktop Site or on their Navigate mobile app.
Who: This feature is for current students.
To open the Checklist, select the Checklist link on your Navigate Student Desktop Site. You can find the Checklist link on the left-hand side of your navigation tool bar.
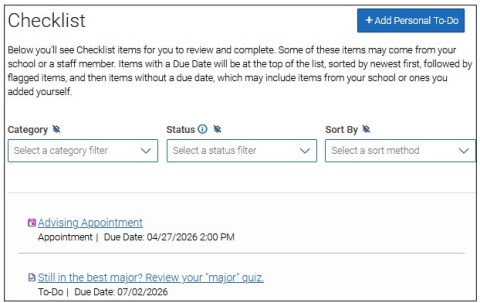
Students can do the following on the Checklist screen:
- View any upcoming appointments.
- View any To-Do items, Tips and Events, and Journeys.
- Select the Add Personal To-Do button to create their own personal To-Do.
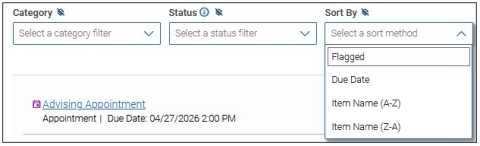
- Filter by Category, Status, or Sort By.
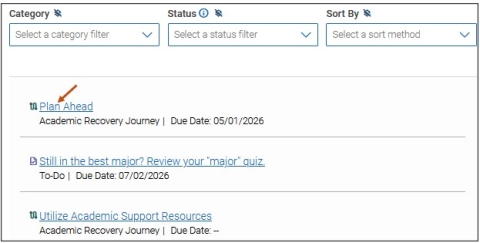
The default sort on Checklist follows these criteria:
- Items with a due date are sorted by due date, with the closest upcoming deadline shown first.
- After due dates, flagged items display next in the list.
- Finally, items without a due date display last on the checklist.
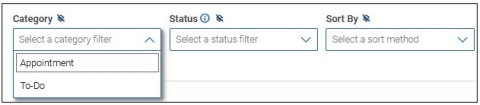
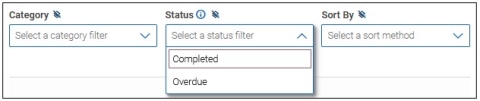
Students can filter their checklist by category or status. Categories may include To-Do, Personal To-Do, Staff To-Do, Autocomplete To-Do, Tip, Event, and Journey titles. They can also change the sort on their items. These choices will persist if the student opens an item and then returns to the main Checklist.

Category drop-down menu options may include:
- To-Dos
- Personal To-Dos
- Staff To-Dos
- Autocomplete To-Dos
- Tips
- Events
- Journey titles
Status drop-down menu options include:
- Completed
- Overdue
Sort By drop-down menu options include:
- Flagged
- Due Date
- Item Name (A-Z)
- Item Name (Z-A)
Tips accessed from the Checklist work very similarly to how they work on the To-Dos and Events page, providing resources and allowing the student to add To-Do Topics.
Tips are pieces of advice or suggestions on the best ways to reach graduation, such as Make sure to get 8 hours of sleep before a midterm, Don’t forget your flu shot, and Study in 15-minute increments to boost retention. They are also a great opportunity to involve students in the content creation process for Navigate360 Student.
Students can also create personal To-Do’s on the main Checklist page from their Navigate Student Desktop Site or from their Navigate mobile app
by selecting the Add a Personal To-Do button.
After selecting the Add a Personal To-Do button, the standard Add Personal To-Do page opens. Students can do the following:
- Create a Personal To-Do title.
- Select True or False from the drop-down menu to make the Personal To-Do an all day event.
- Select a date and time.
- Enter any text to provide a description for your Personal To-Do.
- When completed, please select the Save Personal To-Do button.
Student can select a Checklist item.
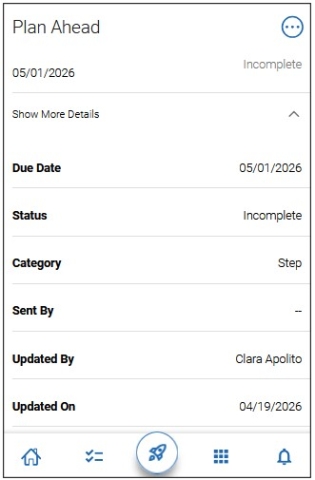
When a student selects a Checklist item, an Item page opens. Students see the item’s due date (if configured), the start date (for legacy To-Dos), configured content blocks, any resources attached to the item, as well as related topics. On mobile, details are collapsed and students can press Show More Details for some details so that content blocks and resources are the focus.
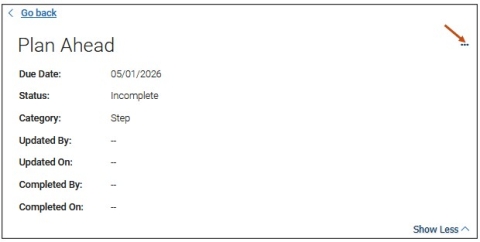
Steps for Journeys have slightly different options. Students can flag an item and mark it complete with a completion reason.
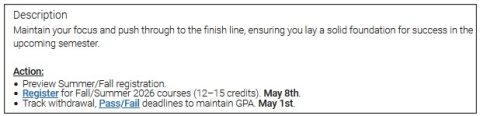
To flag a Journey step, students select the three-dot menu and select Flag Item from the menu. The example below is the Plan Ahead Journey step.
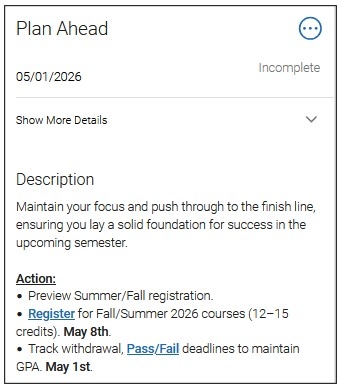
A description and action steps for the particular Checklist item.
Checklist Item Completion Details section. Students can select a Completion Reason from the drop-down menu and provide comments in the open text box area. Please Note: Completion Reasons for Journeys steps have two options by default: This is completed, and This isn't relevant.
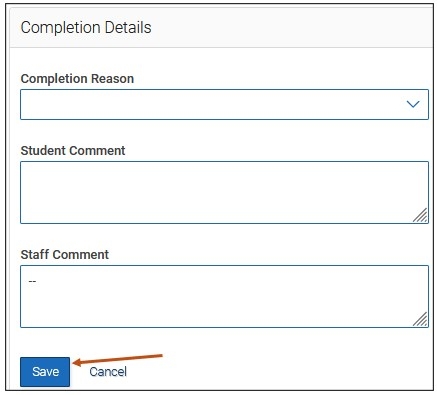
When done, please select the Save button.
Accessing Your Checklist - Navigate Student Mobile App
To access your Checklist via your Navigate Student mobile app, please follow these steps:
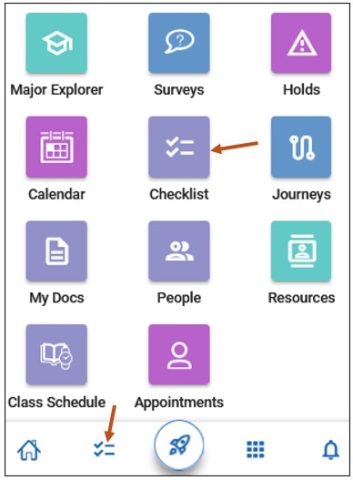
Step 1: From your Navigate mobile app, please select the Applications icon to access all your Navigate Student icons.

Step 2: Select the Checklist icon.
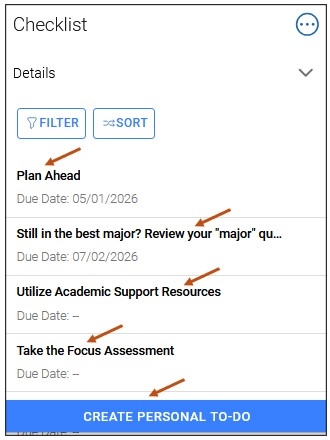
After selecting your Checklist icon, you will be taken to your Checklist page where you can view and select your Checklist items. Filter and sort buttons are available. You can also select the Create Personal To-Do button to create your own personal to-do.
The example below is the Plan Ahead Journey step.
A description and action steps for the particular Checklist item.
Checklist Item Completion Details section. Students can select a Completion Reason from the drop-down menu and provide comments in the open text box area. Please Note: Completion Reasons for Journeys steps have two options by default: This is completed, and This isn't relevant.
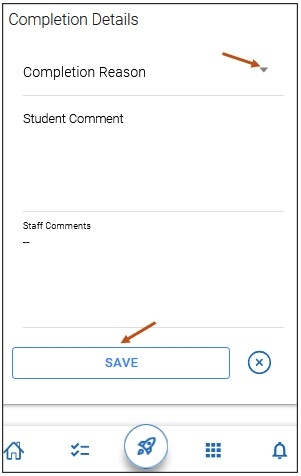
When done, please select the Save button.